In the beginning of 2023 Calor Gas decided they were no longer going to supply the smaller 3.9kg / 4.5kg gas cylinders due to lack of sales.
These sizes are used by the leisure market, both boating and motor homes & caravans. Of course these activities had been pretty much shut down by the Covid 19 restrictions. Despite numerous campaigns to get them to change their plans they seemed determined to press ahead. I have long had a distrust of gas on boats, and there are often difficulties getting gas cylinders filled when you sail to different countries. For these reasons I decided to change Isosceles over to electric cooking.
Note: since I started all of this work Calor Gas have gone back on their decision. Unfortunately these cylinders remain difficult to get at times. Local distributors have got rid of their exchange cylinders due to Calor’s insistence regarding this policy. The upshot is many shops don’t have the cylinders they need to exchange with Calor any more. Personally I have already spent money on solar panels and controllers so I’m committed to going electric for cooking.
Where to mount the panels?
The first part of this was fitting a hybrid lithium battery bank as discussed in the blog HERE. Now it was time to look at charging these batteries in order for me to be able to cook. I’m not over keen on marina life, it’s a bit like living in a trailer park. Not that there’s anything wrong with that. But I live on a boat for the ever changing views of the world around us, not a view of the boat right along side mine.
There are two main options for mounting solar panels on a sailboat: On an arch, or what it known as “bat wing style”. With this option they are mounted on the rails either side of the boat. I didn’t particularly want an arch sticking up on the boat. There’s nothing wrong with an arch, I just prefer the “Bat wing” style.
One job always leads to another
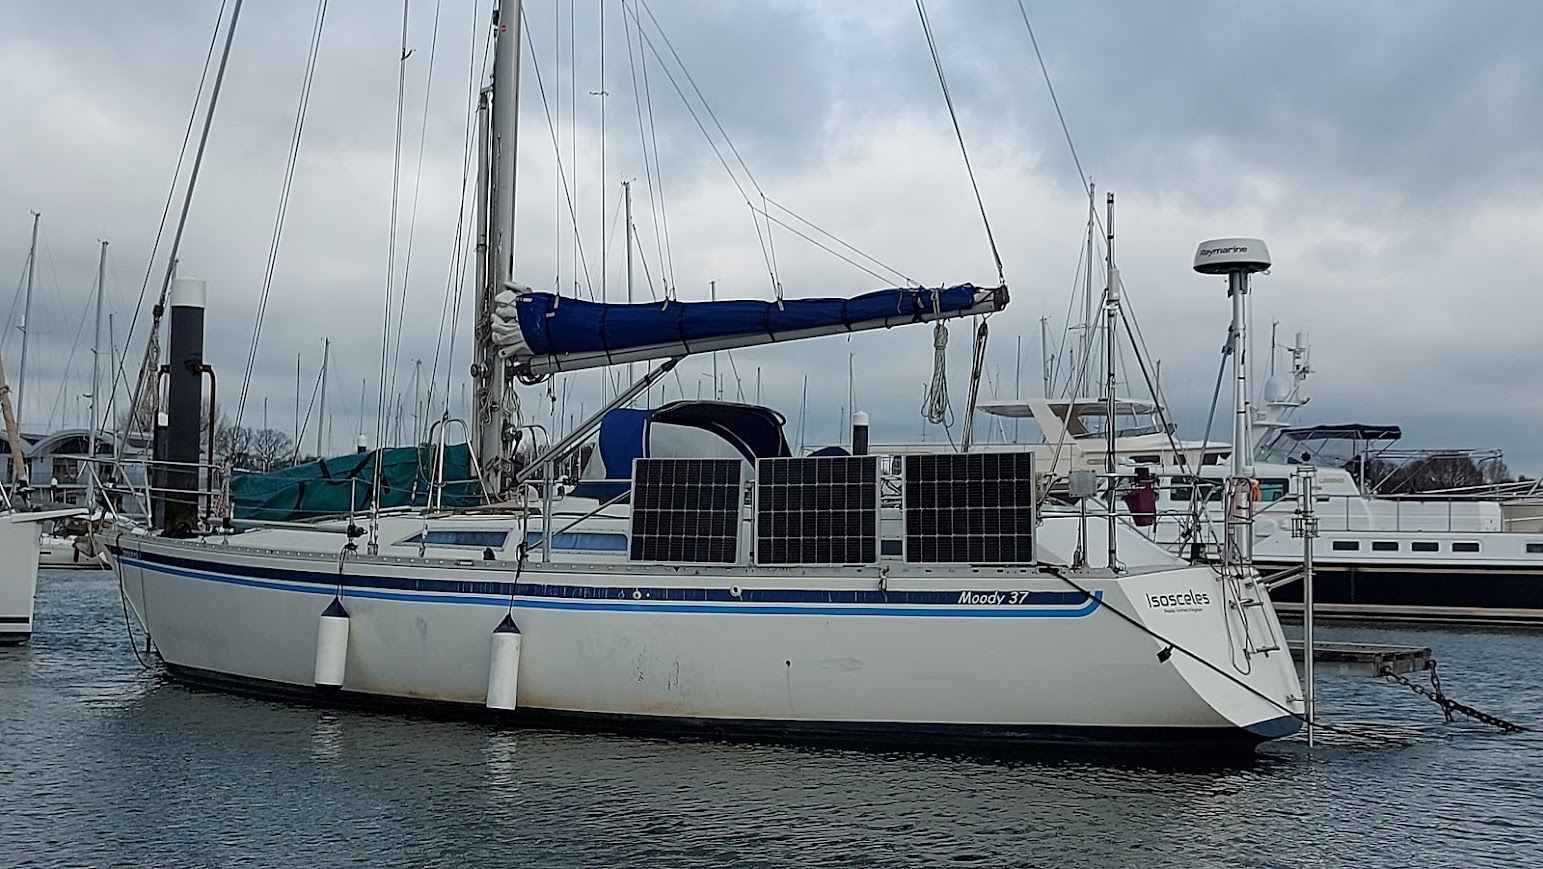
I had previously had two small and lightweight flexible solar panels mounted on the guard wires. These had worked well, but I needed much more if I was going to be able to cook regularly using electric. I had noticed with mounting panels on the guard wires was the amount of wear that had been caused. Those panels were not particularly heavy, but constant movement with wind and waves caused a sawing movement in the wires. I was going to have to build some solid rails around the stern quarters of the boat to mount the panels on.
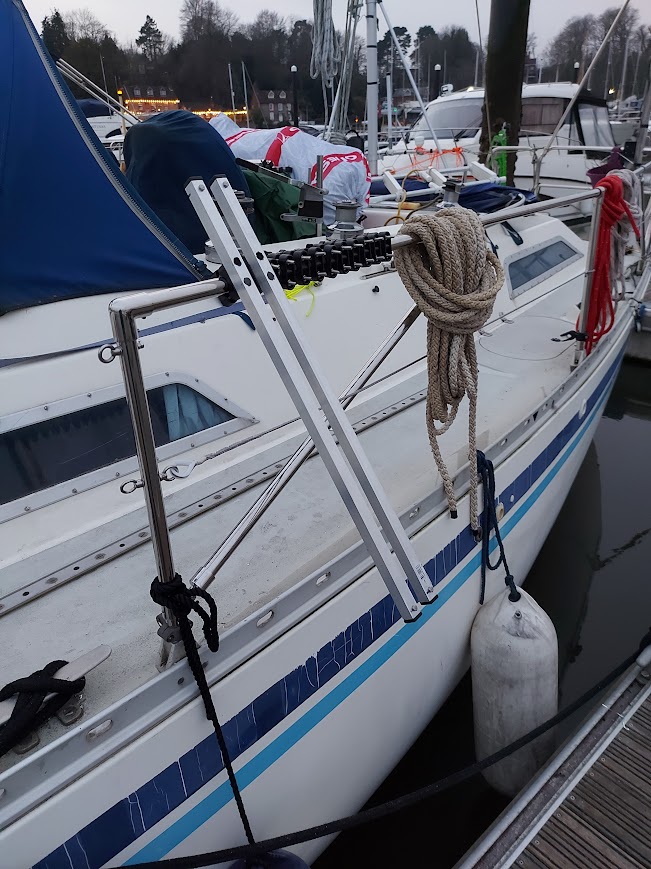
The plan was relatively simple. Remove the aft two upright stanchions on each side and replace with one inch stainless steel tube. Then I could run a tube across the top of these and back to the pushpit rail around the back of the boat. Of course these hadn’t been moved for nearly 40 years, so things didn’t exactly go to plan.
I ended up grinding the aluminium stanchions down and sleeving the stainless steel tube over the top of them. There are three bolts holding each tube to the stanchion underneath it. I know there will be some who say this work around is a “bodge”, but the alternative was taking nearly half of the interior to pieces in order to release the stanchion bases and then taking them to an engineering shop.
I think the end result is good, and it is probably stronger than using just the hollow tube for stanchions.
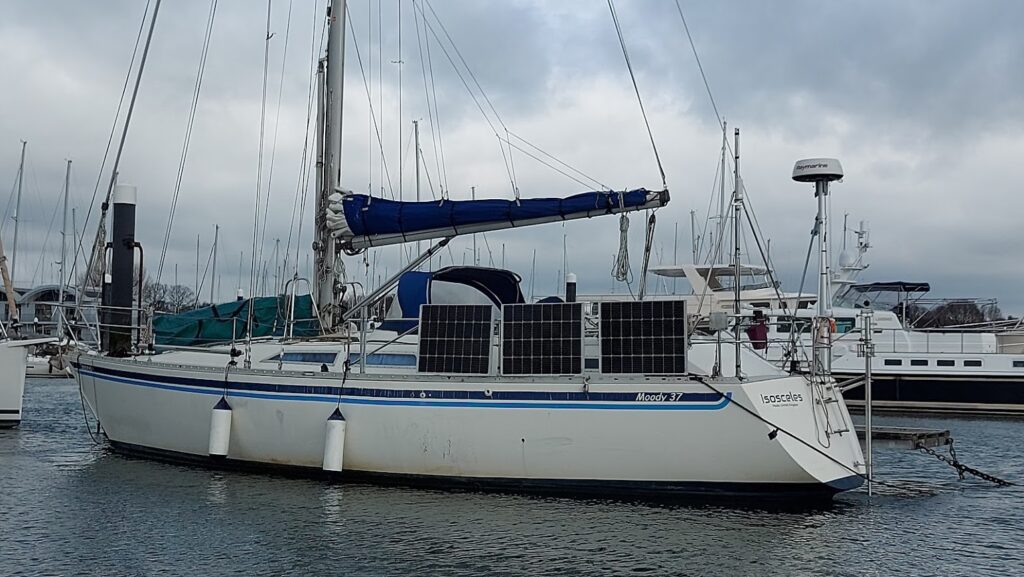
Of course these changes meant replacing the old wire lines that ran through the stanchions. This was probably a bonus as because, as I’ve already mentioned, the wires had been cutting through the stanchions. Replacing them with 5mm Dynema was a relatively easy job, and as this has a higher breaking strain than the stainless steel wire they replaced there is no loss of functionality.
Fitting the solar panels
Now I had to find a way of fitting the solar panels to each side rail. I attached two pieces of aluminium box section to each solar panel, and then attached each of the two struts to the rail with a simple rail mount clamp. This is the one part of the project I’m not totally happy with. I’m on the lookout of a better way of hanging them on the rail so I can adjust them. If you have any ideas drop me a line.
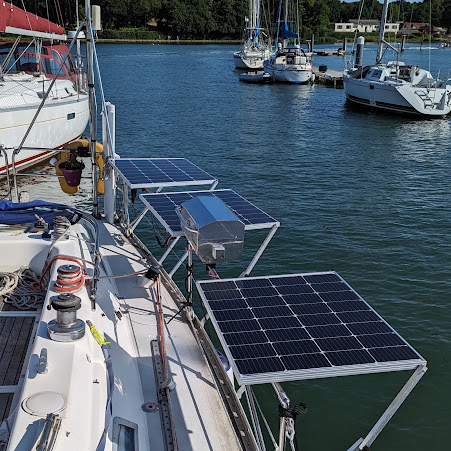
To hold the panels up when they are out horizontal I then fashioned a folding leg from the panel down to the toe rail. This folds in quite nicely when the panel is folded down.
“Free” electricity to spare
Ok, it’s not been free buying all the panels, fittings, wiring and controllers. But now I have a plentiful supply of electricity for cooking and domestic use. I have even had to fit a timer switch for the immersion heater. That way when the batteries are full and there plenty of daylight left I can use a bit if power to heat some water, that saves boiling the kettle later to wash the pots.

